Navigation
Random Favorite Product
Fast Orange
A Must Have for Every Shop
Advertisers
1968 Corvette
Front Suspension Disassembly
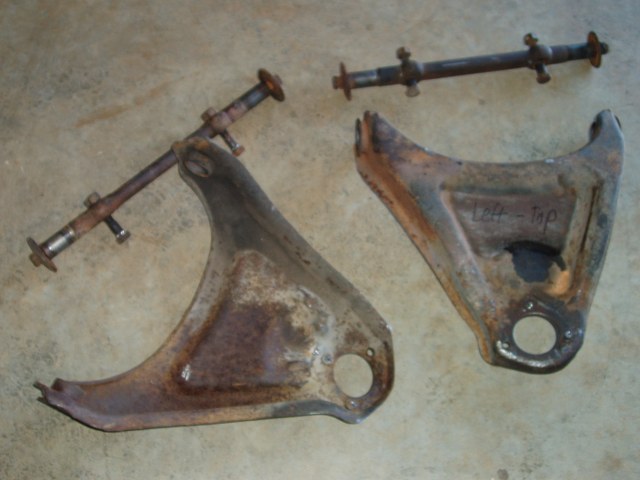
To continue with taking apart the front end, I disassembled the rest of the front suspension to prepare for painting. Once the ball joints were removed by drilling out the factory rivets and chiseling the heads off, the only parts left to be removed was the control arm shaft. To remove the shaft, I removed the end bolts/caps, placed the control arm in a hydraulic press and using a socket to support the bottom, I pushed on one side. This action will push one of the bushings out. Then I flipped it doing the same on the other side. This was not hard at all but lighting the rubber on fire and letting it burn out will have the same results of having the shafts removed but quicker.
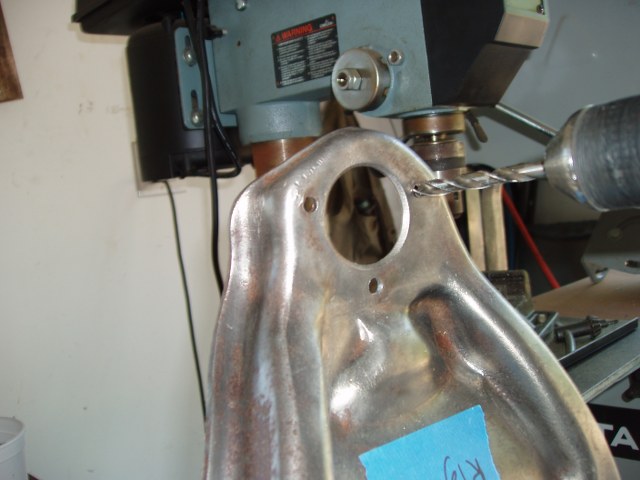
Before painting, I had to drill the holes on the upper control arm where the ball joint rivets once were. The replacement ball joints use bolts that are larger in diameter than the originally riveted area so they wont fit if not drilled out.
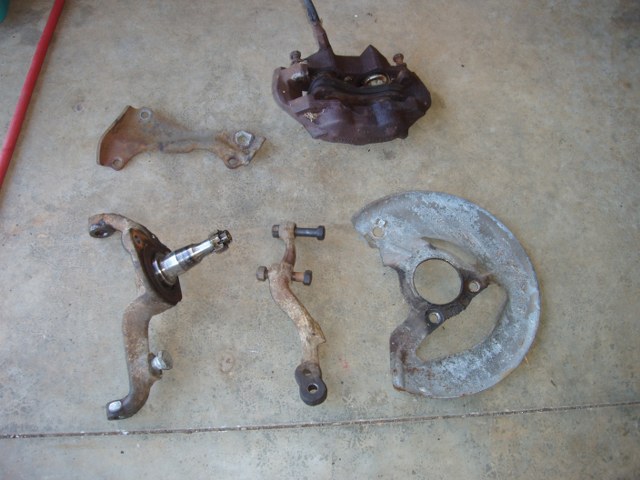
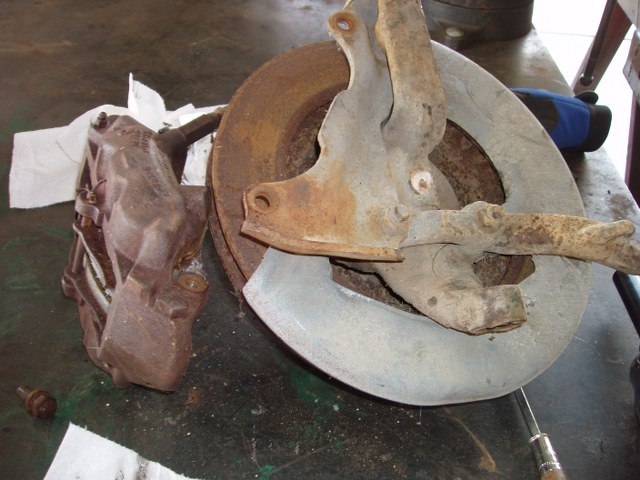
Next, I removed the lower control arm from the spindle by taking off the lower ball joint. This only consisted of removing the two bolts on the sides, the small nut on the top, and the large nut on bottom.
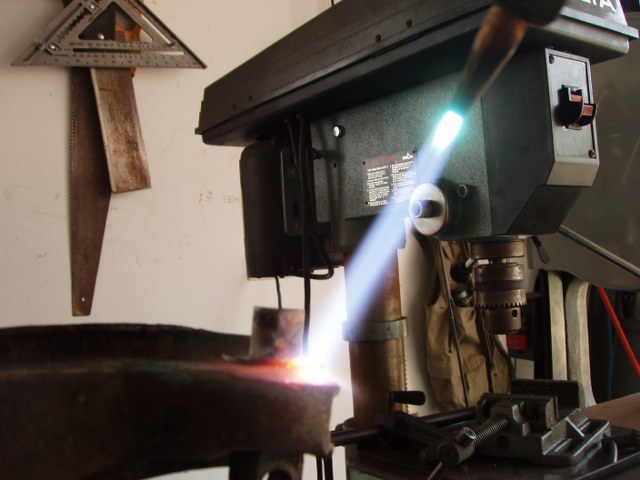
Since I hadnt built my own hydraulic press yet and I didnt have access to a press during the weekend, I resorted using a torch to melt away the rubber bushings. Even though this worked, the metal that had once surrounded the rubber bushing was still lodged in the control arm which prevented the shaft from being removed. To get it out, I used the torch again to loosen the metal. Then using two regular screw drivers, I was able to pry them out. This method can be used on the upper control arms as well, or the metal piece can be banged out with a hammer. Now all there is left is to clean and prepare for painting.

With the control disassembled, I moved on to taking apart the steering knuckle assembly. This wasnt hard to do at all but I will continue to go through each step. Before you can remove the rotor, the caliper has to be removed which only consisted of the two bolts on the back.
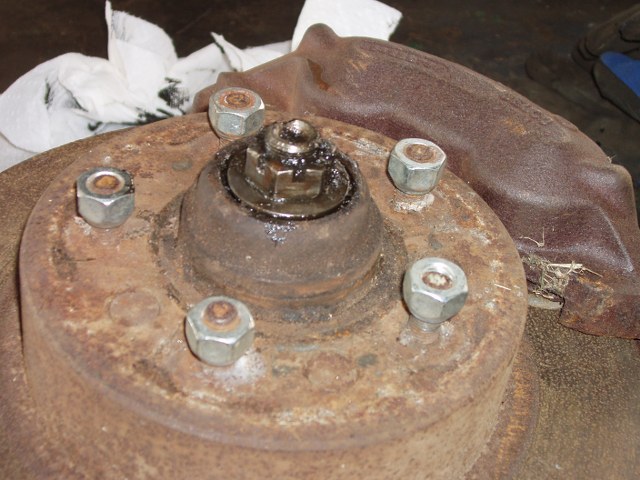
The next part to remove is the rotor. The dust cap on the front of the hub isnt attached to anything so it easily pops off revealing a bolt. Once I removed the cotter pin, the bolt easily came off.
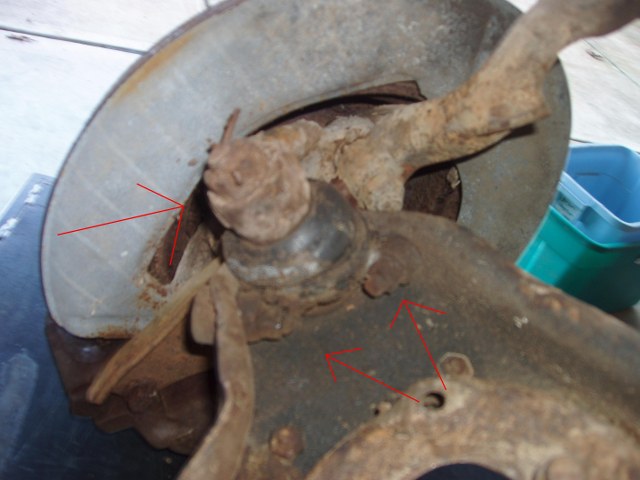
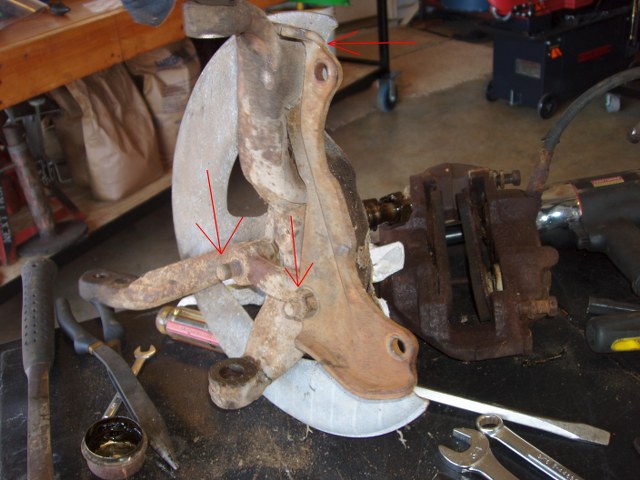
Since there is nothing holding the rotor in place, it can be easily pulled off. The only thing holding the steering knuckle assembly together is the three bolts attached to the dust shield, caliper mount bracket, and steering knuckle arm shown below.
Now I can clean all the parts that have been removed and get them ready for painting.